
And you can do all of these at home, without equipment.
The inspiration for this comes from a pair of orthopedic surgeons who work at a hospital in the greater Toronto area.
Drs Brad Weening and Paul Zalzal have a YouTube channel called Talking with Docs where they combine their brand of dad humour with easy-to-follow information on everything from gut health and blood pressure to arthritis and vitamin B12.
A couple of months ago they did a segment on the Top 5 muscles to train as you age and I thought the essence of it was worth sharing. Their video showed exercises that can be done in the gym or at home. If you want the gym exercises, you can watch the whole segment here.
I’m focusing on what you can easily do at home. If you’re experienced with exercise they’ll be straight-forward, but if you’re not and you’ve been looking for a place to start, this is for you.
I’ll list them in the opposite order to the docs’ list, starting with the most important. Given the video is pitched at a reasonably experienced exerciser, I’ll try to provide a link to a not-too-annoying video or animation showing a simple version of each exercise (I may have failed badly at the not annoying part).
The number 1 muscle to train as we age is our butt, the gluteus maximus. It’s the biggest, strongest, most powerful muscle in our body, and one we need for walking stairs and hills. When GM gets weak our capacity to handle the physical demands of daily life is reduced.
The exercise: bridges (often called glute bridges). I don’t like the docs’ description of how to do it, because they tell viewers to arch their back up to raise the hips.
Don’t arch your back. Instead, press your heels into the floor, tighten your butt, switch on your abdominal muscles, and keeping the back straight, raise your hips.
Don’t try to push your back up high — don’t go further than making a straight line from shoulders to knees. Keep the action in the glutes and abdominals as you bring the hips back down. Try 10 if you can. https://ca.physitrack.com/home-exercise-video/glute-bridge-on-mat (Sorry, that voice over is awful, but you’ll see the movement.)
Number 2 are the quadriceps or thigh muscles. We need these for leg strength — for standing up and sitting down, for keeping us stable when we walk, and for holding the knees straight.
The exercise: standing up and sitting down without using your arms and hands to help, i.e. the sit-to-stand exercise. Or you can do squats, which just eliminates the chair.
In both exercises, keep your knees in line with the middle of your toes, not rolling inwards. Again, try 10 if you can. This video is on squatting, but there’s no need to jump to find your feet position. And only go as low as works for you. https://www.youtube.com/watch?v=P-yaD24bUE8
Number 3 are the calves. These are really two muscles, one on top of the other on the back of each leg. On the outside is the fleshy one we know as the calf, but underneath that is another flatter muscle.
Calves are important because we use them to push off when we walk. To walk more quickly or strongly, we need more calf action. And as the docs point out, walking speed is used as a measure of longevity.
The exercise: heel raises or calf raises. We can do this with or without holding on to something that doesn’t move, like a bench or post, and raising our heels off the floor. The animation in the link uses no support, but if you’re not practiced at this, hold on. Do as many as you can before your calves feel weary, then give them a stretch.
We can make the exercise harder by doing it on a step, ledge, or even a thick book, which makes us take our heel through a greater range. Be careful if you try this (don’t wear slippery shoes or do it on a wet step). And hold on. We can make it harder still by holding a weight in one hand or by only using one leg. https://www.verywellfit.com/how-to-do-calf-raises-4801090
Number 4 are the back extensors. These are the thin muscles in our lower back area, plus the chain of little ones that run up our spine. The docs refer to these as the muscles that hold us up straight, so we don’t collapse forward as we get older.
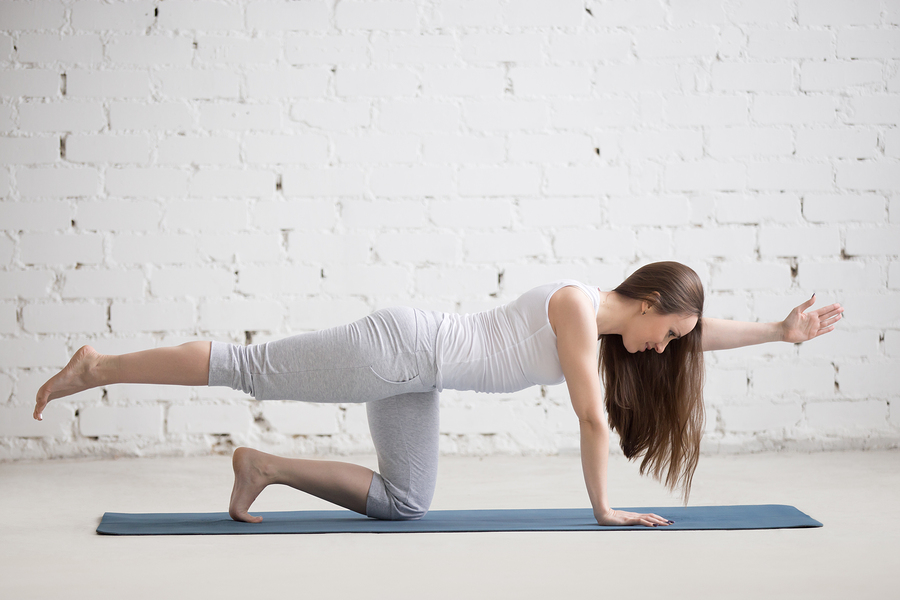
The exercise: ‘birddog’. On all fours, with knees under hips and wrists under armpits, draw the area just below your belly button up towards your spine to switch on your deep abdominals.
Try to keep your trunk still as you reach one arm out in front of you and your opposite leg behind you. Point your thumb to the ceiling.
Imagine your arm is reaching from your shoulder blade and your leg is extending from your butt on that side. Push out through the heel of your extended leg. (We’re supposed to look like a hunting dog when we do this.)
The video (and the photo) shows the way your arm, back and leg create a horizontal line. Hold the position for a couple of seconds, then keeping your trunk still, smoothly bring your arm and leg back to the starting position and do the movement on the opposite side. If you’re new to this, try 3 or 4 on each side. If not, go for 10 each side. https://www.healthline.com/health/bird-dog-exercise#alignment-tips
When it comes to posture and keeping us upright, we also need strong upper back and shoulder muscles, and there are other exercises we could add, but since the birddog provides some of this, it’s a great place to start.
Finally, number 5 are the core muscles. While the ‘core’ refers to our whole trunk, including the back extensors and our glutes, the docs are referring here to the deep abdominals.
There was merit in their ordering (they started with number 5) because we use the abdominals in all of the other exercises, as well as whenever we bend, lift or carry something. In addition, these muscles help to keep us steady and balanced.
The exercise: the docs’ suggestion is a plank, and these can be done in multiple ways. The video below shows a few of them. Only things I don’t like are the encouragement to tuck the bottom under in the wall plank (just keep a straight back and the bottom in a normal, neutral position), and there’s no need to lift your feet off the floor. If you have pelvic floor or abdominal issues, keep planks small, safe and controlled. https://www.youtube.com/watch?v=8b13VkLlHeo
PS. The birddog is an abdominal exercise too, so stick with that if you don’t fancy a plank.
One other one: grip strength. I also think there could be a place here for improving grip strength. It’s something we need for everyday life. If you’re in the gym using equipment such as dumbbells you’ll already be using your hand muscles. Gardening and housework might provide some of this too.
The exercise: squeezing a soft ball (say, tennis ball size but much softer) or a small rolled up towel. See how long you can squeeze it for, and work towards holding the squeeze for a minute with each hand a couple of times. If 10 seconds is all you can manage to start with, no problem, start there. Do each hand then repeat.
Photo Source: Bigstock (though maybe I should’ve given you a photo of the two docs. I think they wear their surgical caps because neither has much hair…)